Assuming you are in a QWidget from which you want to display an error message, you can simply use QMessageBox.critical(self, "Title", "Message"), replace self by another (main widget for example) if you are not is a QWidget class.
Edit: even if you are not in a QWidget (or don’t want to inherit from it), you can just use None as parent with for instance QMessageBox.critical(None, "Title", "Message").
Edit, here is an example of how to use it:
# -*-coding:utf-8 -*

from PyQt5.QtWidgets import QApplication, QMessageBox
import sys

# In this example, success is False by default, and
#  - If you press Cancel, it will ends with False,
#  - If you press Retry until i = 3, it will end with True


expectedVal = 3


def MyFunction(val: int) -> bool:
    return val == expectedVal


app = QApplication(sys.argv)
i = 1
success = MyFunction(i)
while not success:
    # Popup with several buttons, manage below depending on choice
    choice = QMessageBox.critical(None,
                                  "Error",
                                  "i ({}) is not expected val ({})".format(i, expectedVal),
                                  QMessageBox.Retry | QMessageBox.Cancel)
    if choice == QMessageBox.Retry:
        i += 1
        print("Retry with i = {}".format(i))
        success = MyFunction(i)
    else:
        print("Cancel")
        break

if success:
    # Standard popup with only OK button
    QMessageBox.information(None, "Result", "Success is {}".format(success))
else:
    # Standard popup with only OK button
    QMessageBox.critical(None, "Result", "Success is {}".format(success))
@Meller008
Если я правильно понял вопрос, то например
if error:
    QMessageBox.critical(self, "Ошибка ", "Выделите элемент который хотите изменить", QMessageBox.Ok)
Ответ написан
более трёх лет назад
Комментировать
Комментировать
Assuming you are in a QWidget from which you want to display an error message, you can simply use QMessageBox.critical(self, "Title", "Message"), replace self by another (main widget for example) if you are not is a QWidget class.
Edit: even if you are not in a QWidget (or don’t want to inherit from it), you can just use None as parent with for instance QMessageBox.critical(None, "Title", "Message").
Edit, here is an example of how to use it:
# -*-coding:utf-8 -*

from PyQt5.QtWidgets import QApplication, QMessageBox
import sys

# In this example, success is False by default, and
#  - If you press Cancel, it will ends with False,
#  - If you press Retry until i = 3, it will end with True


expectedVal = 3


def MyFunction(val: int) -> bool:
    return val == expectedVal


app = QApplication(sys.argv)
i = 1
success = MyFunction(i)
while not success:
    # Popup with several buttons, manage below depending on choice
    choice = QMessageBox.critical(None,
                                  "Error",
                                  "i ({}) is not expected val ({})".format(i, expectedVal),
                                  QMessageBox.Retry | QMessageBox.Cancel)
    if choice == QMessageBox.Retry:
        i += 1
        print("Retry with i = {}".format(i))
        success = MyFunction(i)
    else:
        print("Cancel")
        break

if success:
    # Standard popup with only OK button
    QMessageBox.information(None, "Result", "Success is {}".format(success))
else:
    # Standard popup with only OK button
    QMessageBox.critical(None, "Result", "Success is {}".format(success))
In this article, we will discuss the Message Box Widget of the PyQT5 module. It is used to display the message boxes. PyQt5 is a library used to create GUI using the Qt GUI framework. Qt is originally written in C++ but can be used in Python. The latest version of PyQt5 can be installed using the command:
pip install PyQt5
What is a Message Box?
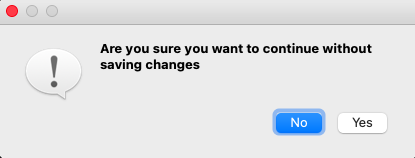
Message Boxes are usually used for declaring a small piece of information to the user. It gives users a pop-up box, that cannot be missed, to avoid important errors and information being missed by the users and in some cases, the user cannot continue without acknowledging the message box.
Based on the applications there are four types of message boxes. The following is the syntax for creating a message box. For any of the boxes, instantiation needs to be done.
Syntax:
msg_box_name = QMessageBox()
Now according to the requirement an appropriate message box is created.
Types of Message Box
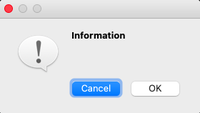
Information Message Box
This type of message box is used when related information needs to be passed to the user.
Syntax:
msg_box_name.setIcon(QMessageBox.Information)
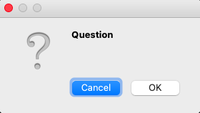
Question Message Box
This message box is used to get an answer from a user regarding some activity or action to be performed.
Syntax:
msg_box_name.setIcon(QMessageBox.Question)
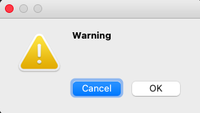
Warning Message Box
This triggers a warning regarding the action the user is about to perform.
Syntax:
msg_box_name.setIcon(QMessageBox.Warning)
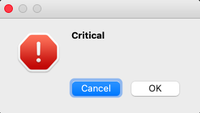
Critical Message Box
This is often used for getting the user’s opinion for a critical action.
Syntax:
msg_box_name.setIcon(QMessageBox.Critical)
Creating a simple Message Box using PyQt5
Now to create a program that produces a message box first import all the required modules, and create a widget with four buttons, on clicking any of these a message box will be generated.
Now for each button associate a message box that pops when the respective button is clicked. For this first, instantiate a message box and add a required icon. Now set appropriate attributes for the pop that will be generated. Also, add buttons to deal with standard mechanisms.
Given below is the complete implementation.
Program:
Python
import sys
from PyQt5.QtWidgets import *
def window():
app = QApplication(sys.argv)
w = QWidget()
b1 = QPushButton(w)
b1.setText("Information")
b1.move(45, 50)
b2 = QPushButton(w)
b2.setText("Warning")
b2.move(150, 50)
b3 = QPushButton(w)
b3.setText("Question")
b3.move(50, 150)
b4 = QPushButton(w)
b4.setText("Critical")
b4.move(150, 150)
b1.clicked.connect(show_info_messagebox)
b2.clicked.connect(show_warning_messagebox)
b3.clicked.connect(show_question_messagebox)
b4.clicked.connect(show_critical_messagebox)
w.setWindowTitle("PyQt MessageBox")
w.show()
sys.exit(app.exec_())
def show_info_messagebox():
msg = QMessageBox()
msg.setIcon(QMessageBox.Information)
msg.setText("Information ")
msg.setWindowTitle("Information MessageBox")
msg.setStandardButtons(QMessageBox.Ok | QMessageBox.Cancel)
retval = msg.exec_()
def show_warning_messagebox():
msg = QMessageBox()
msg.setIcon(QMessageBox.Warning)
msg.setText("Warning")
msg.setWindowTitle("Warning MessageBox")
msg.setStandardButtons(QMessageBox.Ok | QMessageBox.Cancel)
retval = msg.exec_()
def show_question_messagebox():
msg = QMessageBox()
msg.setIcon(QMessageBox.Question)
msg.setText("Question")
msg.setWindowTitle("Question MessageBox")
msg.setStandardButtons(QMessageBox.Ok | QMessageBox.Cancel)
retval = msg.exec_()
def show_critical_messagebox():
msg = QMessageBox()
msg.setIcon(QMessageBox.Critical)
msg.setText("Critical")
msg.setWindowTitle("Critical MessageBox")
msg.setStandardButtons(QMessageBox.Ok | QMessageBox.Cancel)
retval = msg.exec_()
if __name__ == '__main__':
window()
Output
In this article, we will discuss the Message Box Widget of the PyQT5 module. It is used to display the message boxes. PyQt5 is a library used to create GUI using the Qt GUI framework. Qt is originally written in C++ but can be used in Python. The latest version of PyQt5 can be installed using the command:
pip install PyQt5
What is a Message Box?
Message Boxes are usually used for declaring a small piece of information to the user. It gives users a pop-up box, that cannot be missed, to avoid important errors and information being missed by the users and in some cases, the user cannot continue without acknowledging the message box.
Based on the applications there are four types of message boxes. The following is the syntax for creating a message box. For any of the boxes, instantiation needs to be done.
Syntax:
msg_box_name = QMessageBox()
Now according to the requirement an appropriate message box is created.
Types of Message Box
Information Message Box
This type of message box is used when related information needs to be passed to the user.
Syntax:
msg_box_name.setIcon(QMessageBox.Information)
Question Message Box
This message box is used to get an answer from a user regarding some activity or action to be performed.
Syntax:
msg_box_name.setIcon(QMessageBox.Question)
Warning Message Box
This triggers a warning regarding the action the user is about to perform.
Syntax:
msg_box_name.setIcon(QMessageBox.Warning)
Critical Message Box
This is often used for getting the user’s opinion for a critical action.
Syntax:
msg_box_name.setIcon(QMessageBox.Critical)
Creating a simple Message Box using PyQt5
Now to create a program that produces a message box first import all the required modules, and create a widget with four buttons, on clicking any of these a message box will be generated.
Now for each button associate a message box that pops when the respective button is clicked. For this first, instantiate a message box and add a required icon. Now set appropriate attributes for the pop that will be generated. Also, add buttons to deal with standard mechanisms.
Given below is the complete implementation.
Program:
Python
import sys
from PyQt5.QtWidgets import *
def window():
app = QApplication(sys.argv)
w = QWidget()
b1 = QPushButton(w)
b1.setText("Information")
b1.move(45, 50)
b2 = QPushButton(w)
b2.setText("Warning")
b2.move(150, 50)
b3 = QPushButton(w)
b3.setText("Question")
b3.move(50, 150)
b4 = QPushButton(w)
b4.setText("Critical")
b4.move(150, 150)
b1.clicked.connect(show_info_messagebox)
b2.clicked.connect(show_warning_messagebox)
b3.clicked.connect(show_question_messagebox)
b4.clicked.connect(show_critical_messagebox)
w.setWindowTitle("PyQt MessageBox")
w.show()
sys.exit(app.exec_())
def show_info_messagebox():
msg = QMessageBox()
msg.setIcon(QMessageBox.Information)
msg.setText("Information ")
msg.setWindowTitle("Information MessageBox")
msg.setStandardButtons(QMessageBox.Ok | QMessageBox.Cancel)
retval = msg.exec_()
def show_warning_messagebox():
msg = QMessageBox()
msg.setIcon(QMessageBox.Warning)
msg.setText("Warning")
msg.setWindowTitle("Warning MessageBox")
msg.setStandardButtons(QMessageBox.Ok | QMessageBox.Cancel)
retval = msg.exec_()
def show_question_messagebox():
msg = QMessageBox()
msg.setIcon(QMessageBox.Question)
msg.setText("Question")
msg.setWindowTitle("Question MessageBox")
msg.setStandardButtons(QMessageBox.Ok | QMessageBox.Cancel)
retval = msg.exec_()
def show_critical_messagebox():
msg = QMessageBox()
msg.setIcon(QMessageBox.Critical)
msg.setText("Critical")
msg.setWindowTitle("Critical MessageBox")
msg.setStandardButtons(QMessageBox.Ok | QMessageBox.Cancel)
retval = msg.exec_()
if __name__ == '__main__':
window()
Output
Уведомления
- Начало
- » Python для новичков
- » Вывод ошибки от PyQt5 в консоль
#1 Авг. 1, 2017 09:41:14
Вывод ошибки от PyQt5 в консоль
При использовании PyQt5, например при нажатии кнопки к которой привязана функция, если что-либо в ней (функции) идет не так — программа “падает” и ничего не выдается об ошибке в консоль IDE (в моем случае PyCharm), возможно кто знает, как это исправить?
upd (решение):
https://stackoverflow.com/questions/34363552/python-process-finished-with-exit-code-1-when-using-pycharm-and-pyqt5
 # Back up the reference to the exceptionhook
sys._excepthook = sys.excepthook
def my_exception_hook(exctype, value, traceback):
    # Print the error and traceback
    print(exctype, value, traceback)
    # Call the normal Exception hook after
    sys._excepthook(exctype, value, traceback)
    sys.exit(1)
# Set the exception hook to our wrapping function
sys.excepthook = my_exception_hook
 try:
    sys.exit(app.exec_())
except:
    print("Exiting")
Отредактировано gmaksim (Авг. 1, 2017 12:37:16)
Офлайн
- Пожаловаться
#2 Авг. 1, 2017 10:24:29
Вывод ошибки от PyQt5 в консоль
Трудно представить, как можно неправильно запустить программу в пайшарме, но кажется, вам это удалось

Офлайн
- Пожаловаться
#3 Авг. 1, 2017 10:25:54
Вывод ошибки от PyQt5 в консоль
Хотя, может быть просто не туда глядите

Офлайн
- Пожаловаться
#4 Авг. 1, 2017 10:39:43
Вывод ошибки от PyQt5 в консоль
Да как бы не так.
print в функциях работают и выдают информацию (“навесил” для теста). Пример работы консоли и “падения” программы в приложении.
По коду — вызывается класс, в классе идут методы один за другим, в них вызывается GUI другими методами с разными параметрами. Есть метод для сохранения данных в БД, вот там и падает, и это точно какая-то особенность использования в качестве GUI — PyQt5 — так как при использовании tkinter — условно при нажатии кнопки запуска функции сохранения в БД в консоль выводило ошибку, почему она не срабатывала, тут же просто “падает”.
Отредактировано gmaksim (Авг. 1, 2017 10:43:56)
Прикреплённый файлы:  2.PNG (18,8 KБ)
Офлайн
- Пожаловаться
#5 Авг. 1, 2017 10:47:32
Вывод ошибки от PyQt5 в консоль
gmaksim
При использовании PyQt5, например при нажатии кнопки к которой привязана функция, если что-либо в ней (функции) идет не так — программа “падает” и ничего не выдается об ошибке в консоль IDE (в моем случае PyCharm), возможно кто знает, как это исправить?
Онлайн
есть такое и именно в PyQt5. это особенность сборки походу, в С++ такое бывает при сегфолте или нуль-пойнтере. можно из терминала запускать типа python -v my_script
Офлайн
- Пожаловаться
#6 Авг. 1, 2017 10:57:29
Вывод ошибки от PyQt5 в консоль
gmaksim
Ну блин, вы так вопрос задаете “ничего не выдается об ошибке в консоль IDE” как будто у вас нет сообщения об ошибке именно в терминале пайшарма, а другом терминале — все нормально.
PyQt — это набор питоньих обвязок над бинарниками Qt, если что-то “падает” при выполнении этого бинарного кода мы никогда не получим питоньего трейсбэка. Просто, примите это как должное.
Офлайн
- Пожаловаться
#7 Авг. 1, 2017 11:17:21
Вывод ошибки от PyQt5 в консоль
vic57
есть такое и именно в PyQt5. это особенность сборки походу, в С++ такое бывает при сегфолте или нуль-пойнтере. можно из терминала запускать типа python -v my_script
Получилось, только теперь падает на строчке:
conn = sqlite3.connect(‘DATA//db.sqlite’)
sqlite3.OperationalError: unable to open database file
Наверно надо поменять на абсолютный путь?
FishHook
PyQt — это набор питоньих обвязок над бинарниками Qt, если что-то “падает” при выполнении этого бинарного кода мы никогда не получим питоньего трейсбэка. Просто, примите это как должное.
Как-то так и думал, но надеялся, что может есть пути обхода.
python -v my_script похоже на то.
Отредактировано gmaksim (Авг. 1, 2017 11:17:55)
Офлайн
- Пожаловаться
#8 Авг. 1, 2017 11:20:42
Вывод ошибки от PyQt5 в консоль
gmaksim
sqlite3.OperationalError: unable to open database file
это уже не Qt ошибка
Офлайн
- Пожаловаться
#9 Авг. 1, 2017 11:36:42
Вывод ошибки от PyQt5 в консоль
vic57
это уже не Qt ошибка
Угу, я и не имел ввиду, что это Qt ошибка, разобрался, действительно все выводит. Еще раз спасибо.
FishHook
Однако ‘python -v my_script’ (из терминала) все отлавливает (перед “падением”).
Отредактировано gmaksim (Авг. 1, 2017 11:37:10)
Офлайн
- Пожаловаться
#10 Авг. 1, 2017 11:41:23
Вывод ошибки от PyQt5 в консоль
gmaksim
действительно все отлавливает
Что “всё”? Вы же понимаете, что невозможно показать построчный вывод ошибки в скомпилированной сишной библиотеке. Ваша ошибка возникает явно в питоньем коде, поэтому она и отлавливается.
Офлайн
- Пожаловаться
- Начало
- » Python для новичков
- » Вывод ошибки от PyQt5 в консоль
Dialogs are useful GUI components that allow you to communicate with the user (hence the name dialog). They are commonly used for file Open/Save, settings, preferences, or for functions that do not fit into the main UI of the application. They are small modal (or blocking) windows that sit in front of the main application until they are dismissed. Qt provides a number of ‘special’ built-in dialogs for the most common use-cases, allowing you to provide a platform-native user experience.

Standard GUI features — A search dialog

Standard GUI features — A file Open dialog
In Qt dialog boxes are handled by the QDialog class. To create a new dialog box simply create a new object of QDialog type passing in another widget, e.g. QMainWindow, as its parent.
Let’s create our own QDialog. We’ll start with a simple skeleton app with a button to press hooked up to a slot method.
python
import sys

from PyQt5.QtWidgets import QApplication, QMainWindow, QPushButton


class MainWindow(QMainWindow):
    def __init__(self):
        super().__init__()

        self.setWindowTitle("My App")

        button = QPushButton("Press me for a dialog!")
        button.clicked.connect(self.button_clicked)
        self.setCentralWidget(button)

    def button_clicked(self, s):
        print("click", s)


app = QApplication(sys.argv)

window = MainWindow()
window.show()

app.exec()
In the slot button_clicked (which receives the signal from the button press) we create the dialog instance, passing our QMainWindow instance as a parent. This will make the dialog a modal window of QMainWindow. This means the dialog will completely block interaction with the parent window.
python
import sys

from PyQt5.QtWidgets import QApplication, QDialog, QMainWindow, QPushButton


class MainWindow(QMainWindow):
    def __init__(self):
        super().__init__()

        self.setWindowTitle("My App")

        button = QPushButton("Press me for a dialog!")
        button.clicked.connect(self.button_clicked)
        self.setCentralWidget(button)

    def button_clicked(self, s):
        print("click", s)

        dlg = QDialog(self)
        dlg.setWindowTitle("HELLO!")
        dlg.exec()


app = QApplication(sys.argv)

window = MainWindow()
window.show()

app.exec()
Run it! Click the button and you’ll see an empty dialog appear.
Once we have created the dialog, we start it using .exec() — just like we did for QApplication to create the main event loop of our application. That’s not a coincidence: when you exec the QDialog an entirely new event loop — specific for the dialog — is created.
The QDialog completely blocks your application execution. Don’t start a dialog and expect anything else to happen anywhere else in your app. We’ll see later how you can use threads & processes to get you out of this pickle.

Our empty dialog overlaying the window.
Like our very first window, this isn’t very interesting. Let’s fix that by adding a dialog title and a set of OK and Cancel buttons to allow the user to accept or reject the modal.
To customize the QDialog we can subclass it.
python
class CustomDialog(QDialog):
    def __init__(self):
        super().__init__()

        self.setWindowTitle("HELLO!")

        QBtn = QDialogButtonBox.Ok | QDialogButtonBox.Cancel

        self.buttonBox = QDialogButtonBox(QBtn)
        self.buttonBox.accepted.connect(self.accept)
        self.buttonBox.rejected.connect(self.reject)

        self.layout = QVBoxLayout()
        message = QLabel("Something happened, is that OK?")
        self.layout.addWidget(message)
        self.layout.addWidget(self.buttonBox)
        self.setLayout(self.layout)
In the above code, we first create our subclass of QDialog which we’ve called CustomDialog. As for the QMainWindow we apply our customizations in the class __init__ block so our customizations are applied as the object is created. First we set a title for the QDialog using .setWindowTitle(), exactly the same as we did for our main window.
The next block of code is concerned with creating and displaying the dialog buttons. This is probably a bit more involved than you were expecting. However, this is due to Qt’s flexibility in handling dialog button positioning on different platforms.
You could of course choose to ignore this and use a standard QButton in a layout, but the approach outlined here ensures that your dialog respects the host desktop standards (OK on left vs. right for example). Messing around with these behaviors can be incredibly annoying to your users, so I wouldn’t recommend it.
The first step in creating a dialog button box is to define the buttons want to show, using namespace attributes from QDialogButtonBox. The full list of buttons available is below.
QDialogButtonBox.OkQDialogButtonBox.OpenQDialogButtonBox.SaveQDialogButtonBox.CancelQDialogButtonBox.CloseQDialogButtonBox.DiscardQDialogButtonBox.ApplyQDialogButtonBox.ResetQDialogButtonBox.RestoreDefaultsQDialogButtonBox.HelpQDialogButtonBox.SaveAllQDialogButtonBox.YesQDialogButtonBox.YesToAllQDialogButtonBox.NoQDialogButtonBox.AbortQDialogButtonBox.RetryQDialogButtonBox.IgnoreQDialogButtonBox.NoButton
These should be sufficient to create any dialog box you can think of. You can construct a line of multiple buttons by OR-ing them together using a pipe (|). Qt will handle the order automatically, according to platform standards. For example, to show an OK and a Cancel button we used:
python
buttons = QDialogButtonBox.Ok | QDialogButtonBox.Cancel
The variable buttons now contains an integer value representing those two buttons. Next, we must create the QDialogButtonBox instance to hold the buttons. The flag for the buttons to display is passed in as the first parameter.
To make the buttons have any effect, you must connect the correct QDialogButtonBox signals to the slots on the dialog. In our case we’ve connected the .accepted and .rejected signals from the QDialogButtonBox to the handlers for .accept() and .reject() on our subclass of QDialog.
Lastly, to make the QDialogButtonBox appear in our dialog box we must add it to the dialog layout. So, as for the main window we create a layout, and add our QDialogButtonBox to it (QDialogButtonBox is a widget), and then set that layout on our dialog.
Finally, we launch the CustomDialog in our MainWindow.button_clicked slot.
python
class MainWindow(QMainWindow):

    # ... add the following method after the __init__

    def button_clicked(self, s):
        print("click", s)

        dlg = CustomDialog()
        if dlg.exec():
            print("Success!")
        else:
            print("Cancel!")
Run it! Click to launch the dialog and you will see a dialog box with buttons.

Our dialog with a label and buttons.
When you click the button to launch the dialog, you may notice that it appears away from the parent window — probably in the center of the screen. Normally you want dialogs to appear over their launching window to make them easier for users to find. To do this we need to give Qt a parent for the dialog. If we pass our main window as the parent, Qt will position the new dialog so that the center of the dialog aligns with the center of the window.
We can modify our CustomDialog class to accept a parent parameter.
python
class CustomDialog(QDialog):
    def __init__(self, parent=None):
        super().__init__(parent)

        self.setWindowTitle("HELLO!")

        QBtn = QDialogButtonBox.Ok | QDialogButtonBox.Cancel

        self.buttonBox = QDialogButtonBox(QBtn)
        self.buttonBox.accepted.connect(self.accept)
        self.buttonBox.rejected.connect(self.reject)

        self.layout = QVBoxLayout()
        message = QLabel("Something happened, is that OK?")
        self.layout.addWidget(message)
        self.layout.addWidget(self.buttonBox)
        self.setLayout(self.layout)
We set a default value of parent=None so we can omit the parent if we wish.
Then, when we create our instance of CustomDialog we can pass the main window in as a parameter. In our button_clicked method, self is our main window object.
python
    def button_clicked(self, s):
        print("click", s)

        dlg = CustomDialog(self)
        if dlg.exec():
            print("Success!")
        else:
            print("Cancel!")
Run it! Click to launch the dialog and you should see the dialog pop up right in the middle of the parent window.

Our dialog, centered over the parent window.
Congratulations! You’ve created your first dialog box. Of course, you can continue to add any other content to the dialog box that you like. Simply insert it into the layout as normal.
Simple message dialogs with QMessageBox
There are many dialogs which follow the simple pattern we just saw — a message with buttons with which you can accept or cancel the dialog. While you can construct these dialogs yourself, Qt also provides a built-in message dialog class called QMessageBox. This can be used to create information, warning, about or question dialogs.
The example below creates a simple QMessageBox and shows it.
python
import sys

from PyQt5.QtWidgets import QApplication, QDialog, QMainWindow, QMessageBox, QPushButton


class MainWindow(QMainWindow):
    def __init__(self):
        super().__init__()

        self.setWindowTitle("My App")

        button = QPushButton("Press me for a dialog!")
        button.clicked.connect(self.button_clicked)
        self.setCentralWidget(button)

    def button_clicked(self, s):
        dlg = QMessageBox(self)
        dlg.setWindowTitle("I have a question!")
        dlg.setText("This is a simple dialog")
        button = dlg.exec()

        if button == QMessageBox.Ok:
            print("OK!")

app = QApplication(sys.argv)

window = MainWindow()
window.show()

app.exec()
Run it! You’ll see a simple dialog with an OK button.

A QMessageBox dialog.
As with the dialog button box we looked at already, the buttons shown on a QMessageBox are also configured with the same set of constants which can be combined with | (the binary OR operator) to show multiple buttons. The full list of available button types is shown below.
QMessageBox.OkQMessageBox.OpenQMessageBox.SaveQMessageBox.CancelQMessageBox.CloseQMessageBox.DiscardQMessageBox.ApplyQMessageBox.ResetQMessageBox.RestoreDefaultsQMessageBox.HelpQMessageBox.SaveAllQMessageBox.YesQMessageBox.YesToAllQMessageBox.NoQMessageBox.NoToAllQMessageBox.AbortQMessageBox.RetryQMessageBox.IgnoreQMessageBox.NoButton
You can also tweak the icon shown on the dialog by setting the icon with one of the following.
| Icon state | Description |
|---|---|
QMessageBox.NoIcon |
The message box does not have an icon. |
QMessageBox.Question |
The message is asking a question. |
QMessageBox.Information |
The message is informational only. |
QMessageBox.Warning |
The message is warning. |
QMessageBox.Critical |
The message indicates a critical problem. |
For example, the following creates a question dialog with Yes and No buttons.
python
    def button_clicked(self, s):
        dlg = QMessageBox(self)
        dlg.setWindowTitle("I have a question!")
        dlg.setText("This is a question dialog")
        dlg.setStandardButtons(QMessageBox.Yes | QMessageBox.No)
        dlg.setIcon(QMessageBox.Question)
        button = dlg.exec()

        if button == QMessageBox.Yes:
            print("Yes!")
        else:
            print("No!")
Run it! You’ll see a question dialog with Yes and No buttons.

Question dialog created using QMessageBox.
Over 10,000 developers have bought Create GUI Applications with Python & Qt!
[[ discount.discount_pc ]]% OFF for
the next [[ discount.duration ]]
[[discount.description ]]
with the code [[ discount.coupon_code ]]
Purchasing Power Parity
Developers in [[ country ]] get [[ discount.discount_pc ]]% OFF on all books & courses
with code [[ discount.coupon_code ]]
Built in QMessageBox dialogs
To make things even simpler the QMessageBox has a number of methods which can be used to construct these types of message dialog. These methods are shown below —
python
QMessageBox.about(parent, title, message)
QMessageBox.critical(parent, title, message)
QMessageBox.information(parent, title, message)
QMessageBox.question(parent, title, message)
QMessageBox.warning(parent, title, message)
The parent parameter is the window which the dialog will be a child of. If you’re launching your dialog from your main window, you can just pass in self.
The following example creates a question dialog, as before, with Yes and No buttons.
python
    def button_clicked(self, s):

        button = QMessageBox.question(self, "Question dialog", "The longer message")

        if button == QMessageBox.Yes:
            print("Yes!")
        else:
            print("No!")
Run it! You’ll see the same result, this time using the built in .question() method.

The built-in question dialog.
Notice that rather than call exec() we now simply call the dialog method and the dialog is created. The return value of each of the methods is the button which was pressed. We can detect what has been pressed by comparing the return value to the button constants.
The four information, question, warning and critical methods also accept optional buttons and defaultButton arguments which can be used to tweak the buttons shown on the dialog and select one by default. Generally though you don’t want to change this from the default.
python
    def button_clicked(self, s):

        button = QMessageBox.critical(
            self,
            "Oh dear!",
            "Something went very wrong.",
            buttons=QMessageBox.Discard | QMessageBox.NoToAll | QMessageBox.Ignore,
            defaultButton=QMessageBox.Discard,
        )

        if button == QMessageBox.Discard:
            print("Discard!")
        elif button == QMessageBox.NoToAll:
            print("No to all!")
        else:
            print("Ignore!")
Run it! You’ll see a critical dialog with customized buttons.

Critical error! This is a terrible dialog.
For most situations these simple dialogs are all you need.
5 ответов
Qt включает в себя класс диалога для сообщений об ошибках QErrorMessage который вы должны использовать, чтобы ваш диалог соответствовал системным стандартам. Чтобы показать диалог, просто создайте объект диалога, затем вызовите .showMessage(). Например:
error_dialog = QtWidgets.QErrorMessage()
error_dialog.showMessage('Oh no!')
Вот минимальный рабочий пример скрипта:
import PyQt5
from PyQt5 import QtWidgets

app = QtWidgets.QApplication([])

error_dialog = QtWidgets.QErrorMessage()
error_dialog.showMessage('Oh no!')

app.exec_()
mfitzp
24 окт. 2016, в 19:04
Поделиться
Все вышеперечисленные варианты не работали для меня, используя Komodo Edit 11.0. Просто вернул «1» или, если не был реализован «-1073741819».
Полезным для меня было: решение Ванлока.
def my_exception_hook(exctype, value, traceback):
    # Print the error and traceback
    print(exctype, value, traceback)
    # Call the normal Exception hook after
    sys._excepthook(exctype, value, traceback)
    sys.exit(1)

# Back up the reference to the exceptionhook
sys._excepthook = sys.excepthook

# Set the exception hook to our wrapping function
sys.excepthook = my_exception_hook
ZF007
13 нояб. 2017, в 20:15
Поделиться
Следующее должно работать:
msg = QMessageBox()
msg.setIcon(QMessageBox.Critical)
msg.setText("Error")
msg.setInformativeText(e)
msg.setWindowTitle("Error")
Это не тот же тип сообщения (разные GUI), но довольно близко. e — выражение для ошибки в python3
Надеюсь, что это помогло,
Narusan
24 окт. 2016, в 18:21
Поделиться
Не забудьте вызвать .exec() _ для отображения ошибки:
msg = QMessageBox()
msg.setIcon(QMessageBox.Critical)
msg.setText("Error")
msg.setInformativeText('More information')
msg.setWindowTitle("Error")
msg.exec_()
NShiell
08 янв. 2019, в 12:47
Поделиться
Чтобы показать окно сообщения, вы можете вызвать это определение:
from PyQt5.QtWidgets import QMessageBox

def clickMethod(self):
    QMessageBox.about(self, "Title", "Message")
Karam Qusai
17 апр. 2019, в 10:06
Поделиться
Ещё вопросы
- 1Как установить свойство Valuse элемента списка, чтобы исправить идентификатор из строки таблицы базы данных?
- 0включить часть сайта в мой сайт
- 0Сохранение подключения MySQL на Express
- 1Отправка электронного письма с приложением из приложения
- 0Как реализовать одно и то же действие с переходом и без перехода?
- 1NetBeans не распознает импортированный класс
- 1MediaPlayerClass: MediaPlayer запускается без какого-либо очевидного кода
- 0Реализация класса List Ошибка выделения памяти с указателем
- 0jquery навигационная анимация шоу
- 1Asp.Net MVC отправляет JSON как строку, всегда усеченную на сервере
- 1После обновления Android Studio 3.3 до 3.4 AAPT2 генерируется ошибка
- 1Веб-сайт Azure Подключение к базе данных Azure отлично работает на локальных, но не развернутых
- 0Не удается подключиться к серверу MySQL (LAMP) в облаке Google
- 0AngularJS 10 $ digest () достигнуты итерации. Попытка синхронизировать службу, контроллер и представление с помощью $ watch работает, но вызывает ошибки
- 1Ошибка регистрационного ключа при использовании «extra»
- 0Нужна функция для запуска при выборе опции в выпадающем списке
- 0Объединить результаты двух таблиц, имеющих разную структуру
- 0Передача const char * в foo (char *)
- 0Как визуализировать угловое представление при изменении модели событиями?
- 1Identity Toolkit API ранее не использовался в проекте или он отключен
- 0Написание подготовленных запросов MySQL с узла MySQL?
- 0Разрешить данные не найдены в контроллере AngularJS
- 1Создать открытую переменную для конкретной формы
- 0sql приведен из varchar, чтобы удвоить и сэкономить на дубликате ключа
- 1заменить все выбранные значения как NaN в пандах
- 0после закрытия окна оповещения кнопка отправки не активируется
- 0Фокус AngularJS после создания нового элемента
- 1RegExp для перехвата текста между скобками и / или кавычками
- 1Расширение Python с помощью ошибки C: Ошибка сегментации: 11 в Python [MacOS X]
- 0как показать число, занятое пользователем, сколько времени оно вводится пользователем
- 1Java SE Truth API Morena7
- 1Нечистые функции возвращают что-нибудь?
- 1Рисование TextBox
- 0Выполнение Javascript в глобальном файле только по определенному URL
- 0Пользовательский валидатор не вызывает @service_container
- 0Лучший способ перенаправить старый URL на новый URL
- 1Как установить высоту штрих-кода как 25 мм
- 0Как клонировать элемент jQuery с его данными
- 1Фильтрация результатов по пересечению коллекций?
- 1Как отправить объекты разных классов в одном сообщении Json, чтобы их можно было десериализовать с помощью Gson?
- 1Azure Blob Storage с использованием Https
- 1Временно хранить данные в приложении с несколькими активностями, пока приложение не будет остановлено?
- 1Как сохранить параметры для xtraReport с набором данных в качестве источника данных
- 0$ http.post, приводящий к ошибке OPTIONS 596 или недостаточным аргументам
- 1Android обрабатывает все ограничения AlarmManager
- 1Добавить более одного видео
- 1Чистое разделение вида и кода с помощью Vue с использованием шаблонов
- 0Плагин jQuery Validation — добавление класса ошибок к дополнительным элементам
- 0Dojo dijit TabContainer — встроенный выбор с вкладками
- 0отрицательные расстояния с cv :: HoughLines?