KISAN NEWTON-FS выдает на табло ошибку «Ошибка кармана» ER
Здравствуйте. Помогите разобраться вот в такой проблеме. После счёта денег аппарат KISAN NEWTON-FS выдает на табло ошибку «Ошибка кармана» ER-0106. Машинку чистили не помогло. Опыта маловато с ремонтом такой техники, а чинить всё равно нужно по этому прошу помощи специалистов!!!
- lidi
- Прохожий
- Сообщения: 1
- Зарегистрирован: 15 окт 2012, 11:42
Re: KISAN NEWTON-FS выдает на табло ошибку «Ошибка кармана
![]() STRATEG48ru » 24 окт 2012, 16:24
STRATEG48ru » 24 окт 2012, 16:24
lidi писал(а):Машинку чистили не помогло.
была такая ситуация, почистил не помогло, оказалось что датчики очень чувствительные, т.е. даже маленькая соринка вешает ошибку.
Берите балон с воздухом, открывайте крышку, и продувайте все датчики которые сможете достать трубкой, делать желательно на улице, чтобы пыль обратно не оседала!
мне помогло 
Если спирт замерз в стакане, все равно его не брошу, буду грызть его зубами, потому, что он хороший!
- STRATEG48ru
- Специалист
- Сообщения: 326
- Зарегистрирован: 29 июн 2012, 18:37
Re: KISAN NEWTON-FS выдает на табло ошибку «Ошибка кармана
![]() Garick » 09 фев 2013, 05:55
Garick » 09 фев 2013, 05:55
Сегодня решал такую проблему(при пересчете купюр периодически при отбраковке купюры машинка выдавала ошибку кармана e-0106, что сделал:
1. Открутил нижние крышки с обеих сторон.
2. С правой протер влажной салфеткой пасик (у меня он был красный) на приводных колесиках, протер сами приводные колеса, удалил внутри них всю пыль.
3. С левой стороны снял солинойд, проверил втулку на трещины, проверил переключатель карманов на заусеницы( у меня все было в норме).
4. Почистил все валики перед входом в карман брака — 6 шт.
Прикрутил крышки на место 
После всех этих манипуляций просчитал на машинке 5000 купюр, не разу ошибка не вылезла. Думаю проблема была в запыленном пасике и приводных колесах из-за проскальзывания нарушалась синхронизация датчиков, если так можно выразиться
Желаю успехов!
- Garick
- Новичок
- Сообщения: 5
- Зарегистрирован: 14 апр 2011, 20:58
- Авто: LOGAN
Re: KISAN NEWTON-FS выдает на табло ошибку «Ошибка кармана
![]() VICTORIUS » 27 янв 2015, 04:08
VICTORIUS » 27 янв 2015, 04:08
Ошибка кармана — попадание купюры допустим в счетный карман, а не в карман возврата. Этим заведует шторка, которой управляет соленоид. Бывает откручивается соединительный винт. Сегодня целый день убил та эту проблему. Помогла перепрошивка машинки 
- VICTORIUS
- Прохожий
- Сообщения: 3
- Зарегистрирован: 27 янв 2015, 03:22
Re: KISAN NEWTON-FS выдает на табло ошибку «Ошибка кармана
![]() ThunderGod » 27 янв 2015, 23:04
ThunderGod » 27 янв 2015, 23:04
Возможные причины:
— ложное срабатывание датчика либо стекера (нижний карман) либо реджекта (верхний карман).
Оба датчика нужно почистить обязательно с разборкой, там несложно, откручиваете винты и снимаете пластик карманов спереди. Затем в сервисном меню проверить текущие показания и порог срабатывания (Service-Sensor-Stacker/Reject).
— баг соленоида. Из-за износа может иногда не отрабатывать переключение шторки. Заменить соленоид.
Тестирование — включаете режим сортировки по стороне (функции-лицо) и пробрасывает пачку, чтобы шторка активно работала. Итак раз пять подряд (банкноты после каждого раза перемешиваете).
Если ошибка сопровождается замятием банкноты, то:
— ослаб винт на втулке шторке — протянуть;
— треснула/сломалась втулка шторки (черная пластиковая деталь между шторкой и соленоидом) — заменить втулку;
— заусенцы/нарушена геометрия шторки — поправить/разогнуть.
Если все проверили, то еще бывает глюк платы DriverPCB (слева снизу). Плату подкинуть от другого аппарата для проверки, если это она то попробовать прошить по новой, не поможет — заменить.
Вроде бы ничего не забыл ))
Не знаешь — прочти, не понял — спроси, не хочешь — плати.
-

ThunderGod - Специалист
- Сообщения: 206
- Зарегистрирован: 03 мар 2013, 04:29
Вернуться в Прочие устройства
Кто сейчас на конференции
Сейчас этот форум просматривают: нет зарегистрированных пользователей и гости: 1
-
Contents
-
Table of Contents
-
Troubleshooting
-
Bookmarks
Reject Reason List
Code
R-01
Unfit (Unfit)
R-02
Unfit (Stain)
R-03
Unfit (Breakage)
R-11
Tape
R-12
Double
R-1A
Miss Denom(CIS)
R-1B
Miss Denom(Reflection)
R-1C
Miss Denom(Transmission)
R-1D
No NN Patern
R-1E
Other Paper Size
21
Reject Reason
Code
Reject Reason
R-1F
No Same Patern
R-20
Reco Chain
R-21
Other Denom
R-22
Other Face/Orient
R-23
Over Pocket
R-24
Not Defined Denom
R-25
Insert Chain
R-26
Too Skewed MG
R-50
Recognition Double
R-60
No Serial Number Face
Related Manuals for KISAN Newton A
Related Content for KISAN Newton A
- Manuals
- Brands
- KISAN Manuals
- Cash Counter
- Newton A
- User manual
-
Contents
-
Table of Contents
-
Troubleshooting
-
Bookmarks
Quick Links
Related Manuals for KISAN Newton A
Summary of Contents for KISAN Newton A
-
Page 1
Newton A USER MANUAL… -
Page 2
Thank you for purchasing KISAN product, NEWTON A. Read this operation manual thoroughly before using the product. Follow this operation manual to ensure the safe and proper use of the product and to prevent any physical/material damage. The contents of this manual could be changed without notice. -
Page 3: Table Of Contents
Contents Precaution When inserting banknotes To use the product safely To maximize the durability of the product Daily Checkup Appearance Front Part Rear Part Control Screen Display Specifications Operation of Function Main Menu Display the Detail Counting Result Mode Setting Batch Setting Error &…
-
Page 4: When Inserting Banknotes
When inserting banknotes Do not insert banknotes severely damaged, wet or mixed with alien substances. Make sure that no other foreign substances enter the product including your hands and hair, when inserting and counting banknotes. Straighten the folds or corners of banknotes before insertion. Banknotes should be properly arranged and put on the hopper as shown below.
-
Page 5: To Use The Product Safely
To use the product safely DO NOT place the product near heat sources such as a stove or a heater. DO NOT try to disassemble or repair the product by yourself. Such attempts may cause accidents. DO NOT place heavy objects or liquid containers, such as a beverage can, on the product. DO NOT apply excessive force to the product.
-
Page 6: To Maximize The Durability Of The Product
To maximize the durability of the product DO NOT expose the product to the direct rays of the sun for a long period. DO NOT place the product in a dusty space make sure that the product stays free of dusts or foreign substances , also do not place the product on an unstable or shaky place.
-
Page 7: Daily Checkup
Daily Checkup Remember to shut off the power and unplug the product during the checkup. DO NOT use chemicals when removing dust from the product. The use of chemicals may cause discoloration and deterioration. Under long-term use, such foreign substances as dust may stick to the sensor, causing errors.
-
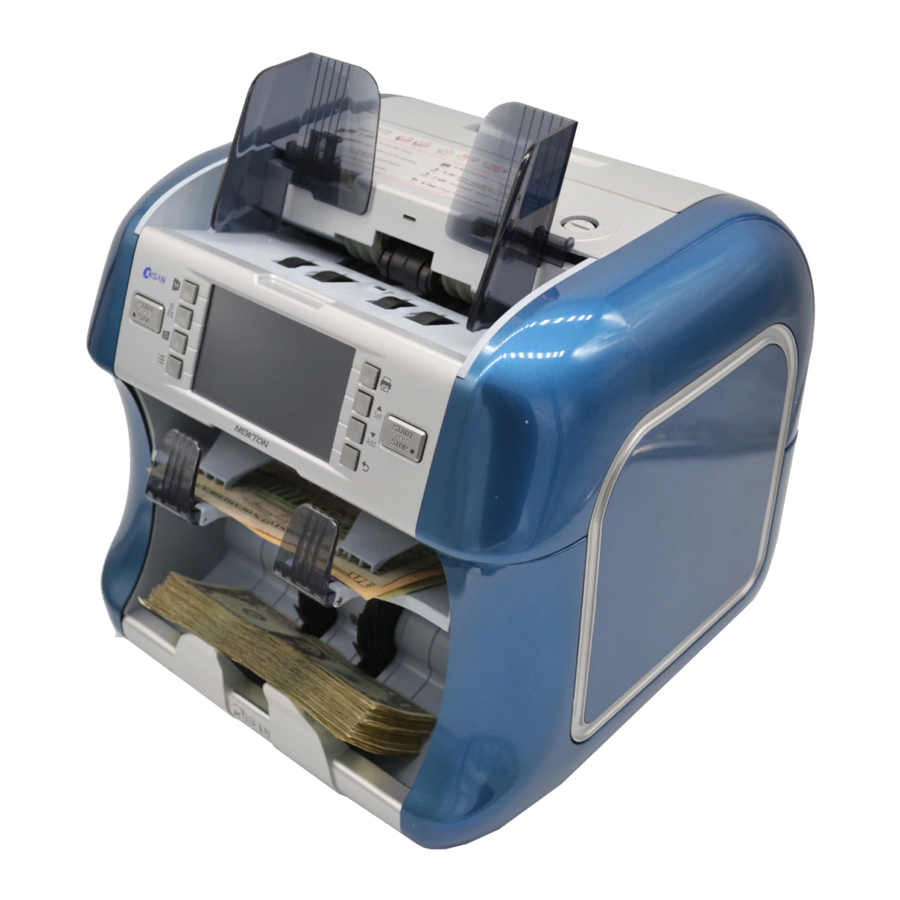
Page 8: Front Part
Front Part Hopper is an area where the banknotes to be placed Hopper guide moves from side to side and adjustable by the size of banknotes Reject stacker is an area Stacker is an area where where the rejected banknotes are taken out upon banknotes are taken out the operational completion…
-
Page 9: Rear Part
Rear Part USB host port is linked to the A-type USB LAN/DEBUG port is linked to Ethernet Power switch turns the power on/off Dust pocket removes dusts collected during the operation Power connector 110-220V power inputted Display port : COM2 Printer Port : COM1 is linked to the external display is linked to the printer…
-
Page 10: Control Screen Display
Control / Screen Display LCD Touch Screen Operation Button START/STOP Button A Newton A can be operated by two users with two different settings and parameters.
-
Page 11: Specifications
Specifications Item Specification Mode Mix, Auto(Single), Count, Face/Orient, Serial No(OCR) Dimension 12.4” x 12.2” x 11.3” (W x D x H) Speed 1500 notes/min : Normal Counting, Value Counting 1000 notes/min : Serial Number Detecting Pocket Capacity Hopper 600 notes Stacker 200 notes Reject 50 notes Currency…
-
Page 12: Operation Of Function
Operation of Function MODE PRINT ▲ BATCH COUNT ▼ DATA 10,000 MENU 2617HEJ776 When the machine is powered on, the screen will be displayed as above. ( The settings in the screen may differ from actual one. ) Touch the icon on the screen or press the button on the side of each icon to select a menu.
-
Page 13: Main Menu
Main Menu MODE PRINT ▲ BATCH COUNT ▼ DATA 10,000 MENU 2617HEJ776 Button Short Press Long Press MODE Switching Mode (Auto->Mix->Denom->Free) Switching to the mode settings screen BATCH Switching batch value(10->20->50->100->150->200) Switching to batch value setting screen DATA Count Result/Total/History , SerialNumber Switching to the Check-Log screen MENU Counting Speed change…
-
Page 14
COUNT 10,000 2617HEJ776 ICON Screen Touch Switching the country currency Switching to Time Setup Screen Switching to Reject Reason Screen Switching to detail counting result Screen… -
Page 15: Display The Detail Counting Result
Display the Detail Counting Result : If you want to see more detail breakdown , Touch the screen after counting . MODE PRINT ▲ BATCH ▼ DATA MENU Screen Screen Touch Button Short Press Detail Display the counting information by denomination PRINT Print the counting information / Serial Number ▲SET…
-
Page 16: Mode Setting
Mode Setting : If you want to change the specific mode , Long Press the “MODE” button . MODE PRINT ▲ BATCH ▼ Orient Face Direction DATA MENU Screen Screen Touch Button Short Press Counts only one denomination initially counted Auto Changing Cancel / backward Shows total amount and number of banknotes when…
-
Page 17: Batch Setting
Batch Setting : If you want to change the specific batch value , Long Press the “BATCH” button . MODE PRINT ▲ BATCH ▼ DATA MENU Screen Screen Touch Button Short Press All Number Input the number of batch Changing Cancel / backward Apply the new mode / START/STOP Switching to Main Screen…
-
Page 18
Simple Trouble shooting guide1 Trouble. When there is a lot of Pre-processing image error Solution 1. Remove dust on the CIS. Solution 2. Check the GAP of insert module using Test-Note Solution 3. Adjust the GAP for insert module. (- direction or + direction , P1.1 See picture below) Solution 4. -
Page 19: Simple Trouble Shooting Guide 2
Simple Trouble shooting guide 2 Trouble. When there is in case of a continuous » Check CIS » message Solution 1. Remove dust on the CIS. Solution 2. Update the FPGA SW again using USB Solution 3. Update the APL SW again using USB Solution 4.
-
Page 20
Simple Trouble shooting guide 3 Check Reject Image Setup -> Option -> 1st page -> Mark the Reject Image When the error screen appears. Screen touch “R” -> Banknote -> Image… -
Page 21: Reject Reason List
Reject Reason List Code Reject Reason Code Reject Reason R-01 Unfit (Unfit) R-1F No Same Patern R-02 Unfit (Stain) R-20 Reco Chain R-03 Unfit (Breakage) R-21 Other Denom R-11 Tape R-22 Other Face/Orient R-12 Double R-23 Over Pocket R-1A Miss Denom(CIS) R-24 Not Defined Denom R-1B…
-
Page 22
Reject Reason List Code Reject Reason Code Reject Reason R-C1 Suspect IR R-CC Suspect UV_R, MG_D R-C2 Suspect UV_T R-CD Suspect IR, UV_R, MG_D R-C3 Suspect IR, UV_T R-CF Suspect UV_R, UV_T, MG_D R-C4 Suspect UV_R R-D0 Suspect MG_U R-C5 Suspect IR, UV_R R-D1 Suspect IR, MG_U… -
Page 23: Guide For Components
Guide for Component 1. The Hopper sensor and rollers Clean the hopper sensor and roller as shown in the photo below with a soft towel or a brush…
-
Page 24
2. Recognize Detector Sensor Open the cover by pulling the lever and clean the sensor as shown in the photo with a soft towel or a brush… -
Page 25
3. Stack and Reject Sensor Clean the sensor as shown in the photo with a soft towel or a brush… -
Page 26
4. The Reject count and separate sensor Open the fore panel by pushing “Open Lever” and clean the sensor as shown in the photo with a soft towel or a brush… -
Page 27
5. The dust pocket Pull out a dust tray and clean… -
Page 28
KISAN will make continuous efforts to improve our products. Thank you…