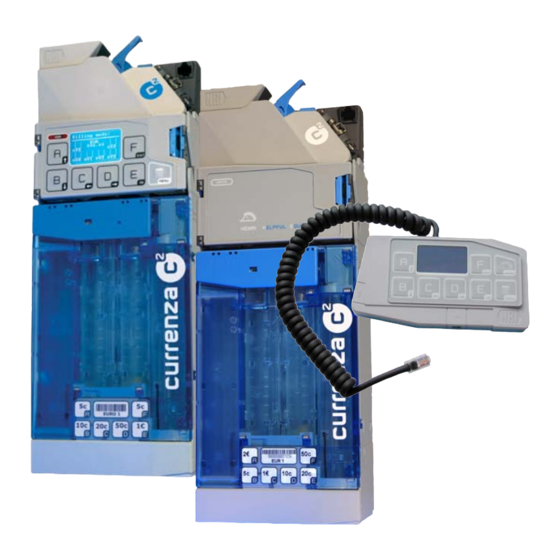
Добрый день, уважаемые форумчане! может кто-то сталкивался с такими же проблемами и сможет дать ответ. монетники currenza c2 green.
1) существует ли механизм(команда) программного обнуления счетчиков данного монетника? т.е. чтобы при инкассации не надо было ждать пока монетник прокрутит моторчики и обнулит свои счетчики?
2) и в обратную сторону, можно ли командой сказать монетнику , что в нем столько -то денег?
3) можно ли отключить security-stock ? невыдаваемые 33 рубля стали проблемой.
вопросы связаны с тем, после смены ПО по регламенту появилась необходимость производить инкассацию ежедневно, загрузка-разгрузка монетников по 1 монетке занимает уж очень много времени+ раньше деньги считал сам монетник, теперь это делает терминал.
-
Contents
-
Table of Contents
-
Bookmarks
Quick Links
Technical Documentation
Coin changer
Short reference guide for service work
11.08 JMo/Schn/Roe
Edition 1.1
KA.C2SA-EN
National Rejectors, Inc. GmbH • Zum Fruchthof 6 • D-21614 Buxtehude
Phone: +49 (0)41 61-729-0 • Fax: +49 (0)41 61-729-115 • E-mail: info@nri24.com • Internet: www.nri24.com
Related Manuals for NRI currenza c2
Summary of Contents for NRI currenza c2
-
Page 1
Technical Documentation Coin changer Short reference guide for service work 11.08 JMo/Schn/Roe Edition 1.1 KA.C2SA-EN National Rejectors, Inc. GmbH • Zum Fruchthof 6 • D-21614 Buxtehude Phone: +49 (0)41 61-729-0 • Fax: +49 (0)41 61-729-115 • E-mail: info@nri24.com • Internet: www.nri24.com… -
Page 3: Table Of Contents
SRG – c service work ABLE OF CONTENTS Table of contents About this short reference guide Text conventions Additional technical documentation Work on the change tubes Displaying the current coin stocks in the tubes (inventory) 7 Giving out single/several coins Giving out single coins Giving out several coins after another Emptying tube cassette…
-
Page 4
SRG – c service work ABLE OF CONTENTS Firmware update Displaying current firmware versions Updating firmware Downloading new firmware and FW update PC application from the internet Installing HenriFlash Loading new firmware in HENRI Installing new firmware in the coin changer Audit (option) Checking audit data with HENRI Which audit data is recorded and in what structure? -
Page 5: About This Short Reference Guide
In order to be able to use the whole functional range of the devices safely as well as to configure all possible functions, all short reference guides for the NRI changer currenza c and HENRI setting module must be read carefully (PDF download at www.nri24.com).
-
Page 6: Additional Technical Documentation
SRG – c service work BOUT THIS SHORT REFERENCE GUIDE 1 2 3 … Requests to perform an action are numbered in another typeface. are set in small capitals. ISPLAY TEXTS BUTTONS and MENU ITEMS are shown in bold capitals. [1/2] Reference to a figure.
-
Page 7: Work On The Change Tubes
SRG – c service work ORK ON THE CHANGE TUBES Work on the change tubes In this chapter you will learn how to • display the current tube counters/levels (inventory) • pay out single coins • empty the change tubes (completely/up to a certain filling level (float level)) •…
-
Page 8: Giving Out Single/Several Coins
SRG – c service work ORK ON THE CHANGE TUBES The security stock per tube possibly configured is not displayed (cp. separate configuration short reference guide). Pressing the inventory key A, B, C, D, E, or F briefly would now pay out single coins and holding down the key would pay out several coins one after another from the appropriate tube.
-
Page 9: Giving Out Several Coins After Another
SRG – c service work ORK ON THE CHANGE TUBES Giving out several coins after another To give out several tube coins: Hold down the corresponding key A–F for approx. five seconds. The tube gives out several coins. Press any other key A–F. The coins will stop being paid out.
-
Page 10: Emptying All Change Tubes Up To Certain Filling Level (Float Level)
SRG – c service work ORK ON THE CHANGE TUBES Emptying all change tubes up to certain filling level (float level) If a float level is configured for each change tube, the change tubes can be emptied up to the number of tube coin set in the float levels. (Cp. separate configuration short reference guide) To empty all change tubes up to the float level: Connect c…
-
Page 11: Refilling Change
SRG – c service work ORK ON THE CHANGE TUBES Refilling change … The coin changer can be provided with change either by inserting the tube coins when the empty tube cassette is installed, or you remove the empty tube cassette and fill the cassette direct..
-
Page 12: C 2 Blue/C 2 White/Orange
SRG – c service work ORK ON THE CHANGE TUBES blue/c white/orange Connect c white/orange with HENRI setting module (plug HENRI RJ-45 connector into coin changer socket in the upper right hand corner, cp. separate HENRI short reference guide). HENRI switches to c² mode automatically and displays the current change stock if there is no error.
-
Page 13: C 2 Green
SRG – c service work ORK ON THE CHANGE TUBES The corresponding tube counter counts the coins accepted. The tubes are full when the • full sensor is covered, • configured filling level limitation has been reached or • configured float level has been reached. (Cp.
-
Page 14
SRG – c service work ORK ON THE CHANGE TUBES If all tubes are full: Press -key again. The green LED lighting up shows that the changer is no longer in tube filling mode, but back in operating mode. If no coins are inserted in a 30-second time period, the changer returns to operating mode, without the -key being pressed again. -
Page 15: By Filling The Tube Cassette Direct
SRG – c service work ORK ON THE CHANGE TUBES … by filling the tube cassette direct … You can also remove the empty tube cassette and refill it direct. Or you have filled a replacement cassette beforehand and only replace the empty cassette on site.
-
Page 16: With Counted Coins (Float Level)
SRG – c service work ORK ON THE CHANGE TUBES Fig. 1: Removing and reinstalling the tube cassette … with counted coins (float level) If the change tubes are supposed to always be filled with a certain number of coins, this number of coins (float level per tube) as well as the automatic tube counter programming must be set in the coin changer.
-
Page 17
SRG – c service work ORK ON THE CHANGE TUBES blue/white/orange Connect c white/orange with HENRI setting module (plug HENRI RJ-45 connector into coin changer socket in the upper right hand corner, cp. separate HENRI short reference guide). HENRI switches to c² mode automatically and displays the current change stock if there is no error. -
Page 18
SRG – c service work ORK ON THE CHANGE TUBES Reinstall full (replacement) tube cassette: • Insert cassette in upper and lower housing guides (Fig. 1, B). • Push cassette into the housing. • Press cassette down and let it engage in the upper and lower housing guides (audible click) (Fig. -
Page 19
SRG – c service work ORK ON THE CHANGE TUBES The automatic tube counter correction must be deactivated so that the accurately set tube counters will not be corrected according to the filling level sensors. It is possible that the changer reports less change than refilled: In this case the coin changer is set so that the tube counter readings are transmitted to the VMC without security stock (see separate configuration short reference guide). -
Page 20: Optimising Coin Movement In The Tubes
SRG – c service work ORK ON THE CHANGE TUBES Optimising coin movement in the tubes The coin changer currenza c² supports you in setting the tube parameters optimally, i.e. it provides analyses guaranteeing that the tube cassette not only collects as much cash as necessary but also as less as possible depending on the installation site.
-
Page 21: Comparing In And Out Of Tube Coins
SRG – c service work ORK ON THE CHANGE TUBES Comparing in and out of tube coins The required menu item P has already been AYOUT STATISTICS selected. Press OK key to confirm your selection: The changer/HENRI displays for each tube how many per cent of the accepted coins have been paid out.
-
Page 22: Analysing The Coin Movement In The Tubes And Set Tube Parameters Optimally
SRG – c service work ORK ON THE CHANGE TUBES Analysing the coin movement in the tubes and set tube parameters optimally Press B key «down-arrow» to select submenu S TATUS OF ANALYSIS Press OK key to confirm your selection: The analysis is running.
-
Page 23: Token Configuration
SRG – c service work OKEN CONFIGURATION Token configuration This chapter describes how to • teach a new token in a coin channel, • configure this token either as free vend token or as value token, and • erase a token configuration Teaching token in a coin channel The coin changer currenza c²…
-
Page 24
SRG – c service work OKEN CONFIGURATION Press C key to open the S menu: ERVICE Press B key «down-arrow» twice to select submenu T OKEN TEACH Use OK key to confirm your selection: Press OK key again to teach a token. If necessary, use B key «down-arror»/A key «up-arror»… -
Page 25: Configuring The Token Taught For Free Vend Or Payment (Bdv/Executive Only)
A, e.g., can be free vend token and token B value token. Whether a token is directed to the return area or into the cash-box, is customised by NRI. Configuring token values Taught tokens can either be configured as free vend tokens (see next section) or as value tokens.
-
Page 26
SRG – c service work OKEN CONFIGURATION Press E key to open the S menu: ETTINGS Press B key «down-arrow» until submenu C is selected. OIN SETTINGS Use OK key to confirm your selection. Press B key «down-arrow» until submenu T is selected: OKEN Use OK key to confirm your selection:… -
Page 27: Configuring Free Vend Token
SRG – c service work OKEN CONFIGURATION Set token value: • Use D key (right arrow)/C key (left arrow) to highlight the place of the token value to be changed. • Use A key (up-arrow)/B key (down-arrow) to configure the value of the place highlighted.
-
Page 28: Erasing Token Configuration
SRG – c service work OKEN CONFIGURATION Erasing token configuration If a configured token is no longer to be accepted for payment, as the coin channel is to be programmed with another token you are able to erase the present token configuration: Connect c green/white/orange with HENRI setting module (plug HENRI RJ-45 connector into coin changer socket in the upper right…
-
Page 29: Firmware Update
SRG – c service work IRMWARE UPDATE Firmware update In this chapter you learn how to update the c firmware by means of the HENRI setting module. The currenza c is fitted with three microcontrollers the firmware (FW) of which may be updated: •…
-
Page 30: Updating Firmware
Downloading new firmware and FW update PC application from the internet HenriFlash can be downloaded from the NRI website (www.nri24.com) along with the current FW using your customer password. If you have not registered yet: Open NRI website on the internet (www.nri24.com).
-
Page 31: Loading New Firmware In Henri
SRG – c service work IRMWARE UPDATE Loading new firmware in HENRI Connect the USB cable provided to the PC. Select directory started when installing and start «HenriFlash.exe». Select FW to be updated in the start window (c² coin validator, c² coin changer, c²…
-
Page 32: Installing New Firmware In The Coin Changer
SRG – c service work IRMWARE UPDATE Installing new firmware in the coin changer Connect c with HENRI setting module (plug HENRI RJ-45 connector into coin changer socket in the upper right hand corner, cp. separate HENRI short reference guide). HENRI switches to c²…
-
Page 33: Audit (Option)
SRG – c service work UDIT OPTION Audit (option) If the currenza c is fitted with an optional internal audit module, all audit data is collected and evaluated by the changer, so that it may be read out using a mobile data retrieval unit (MDE) or rather printed using a mobile printer for audit purposes.
-
Page 34: General Data
SRG – c service work UDIT OPTION General data The submenu G contains all general audit data of the coin ENERAL DATA changer currenza c²: • M (10-digit) ACHINE NUMBER • N UMBER OF PRINTOUTS READOUTS – since installation – since initialisation –…
-
Page 35: Flow Of Money
SRG – c service work UDIT OPTION • F REE VENDS WITH TOKENS – since initialisation – since last readout – cycles (since initialisation, since last readout) • T EST VENDS – since initialisation – since last readout – cycles (since initialisation, since last readout) •…
-
Page 36
SRG – c service work UDIT OPTION • C OINS TO TUBE IN MANUAL FILLING MODE – since initialisation – since last readout • C OINS PAID OUT MANUALLY – since initialisation – since last readout • C ASH OVERPAY –… -
Page 37
SRG – c service work UDIT OPTION Flow of money using card system The audit data for in and out of cards is listed in the C submenu: ASHLESS DATA • D EBITED FROM CASHLESS – since initialisation – since last readout –… -
Page 38: Displaying Audit Data
SRG – c service work UDIT OPTION Displaying audit data The following abbreviations are used to display the audit data: «Inst.» = since installation «s.Ini.» = since initialisation «s.l.R.» = since last readout Connect c green/white/orange with HENRI setting module (plug HENRI RJ-45 connector into coin changer socket in the upper right hand corner, cp.
-
Page 39: Reading Out Audit Data Using The Irda Interface
OPTION Reading out audit data using the IrDA interface If your coin changer has no integrated IrDA interface, you will require an NRI infrared adapter as an optical interface (cp. also product accessory pages at www.nri24.com) in order to be able to read out the audit data via an infrared data retrieval unit (MDE).
-
Page 40: Printing Out Audit Data Using A Mobile Printer
Printing out audit data using a mobile printer The changer is equipped with an interface (9-pole D-Sub plug) for connecting a printer (e.g. NRI printer G-55.0510, cp. also product accessory pages at www.nri24.com). Depending on the printer connected, the printout is either activated immediately or after a start button has been pressed.
-
Page 41: Readout Of Statistical Data
The currenza c memorises statistical data of turnovers, cash flow and errors, which can be read out by an NRI service technician. In case the HENRI memory is full and all relevant data has been transmitted to a PC the statistics can be erased.
-
Page 42: Erasing Statistical Data From Henri Memory
SRG – c service work EADOUT OF STATISTICAL DATA Press A key again to save the statistical data. The bottom line displays the free space left on the HENRI memory (e.g. «001/128»): If HENRI displays «128/128», the memory is full and the stored statistics must be erased (see next section).
-
Page 43
SRG – c service work EADOUT OF STATISTICAL DATA First press the B key and then the E key if you really want to delete all statistics, if not, use the F key to cancel the process: National Rejectors, Inc. GmbH, Buxtehude… -
Page 44: Index
SRG – c service work NDEX Index A–F keys 8, 9 Danger 5 Accentuations in the text 5 Delete Acceptance band, token statistical data 42 erase 28 token configuration 28 narrorw 23 Display texts 6 wide 23 Disposal 5 Attention 5 Documentation, additional 6 Audit data dsp (file extension) 30…
-
Page 45
Menu Status of analysis 22 items 6 Summary, chapter 5 texts 6 Symbols in the text 5 mot (file extension) 30 New version 32 Notes 5 Nri(64)HidAPI.dll 30 Operating instructions, additional 6 Optical adapter 39 National Rejectors, Inc. GmbH, Buxtehude… -
Page 46
SRG – c service work NDEX Teach tokens 23 Text conventions 5 Token audit data 34 erase 28 for payment/free vend 25 teach 23 value 26 Tube coins, optimise stock 20 filling level 13, 18 Tube cassette empty 9 up to float level 10 fill by inserting coins 11 direct filling 15…
21.04
«Битва роботов» 2023
На Госуслугах завершился приём заявок на участие в международном чемпионате инженерных команд «Битва роботов».
31.03
Маркировка напитков
Минпромторг предложил начать проводить эксперимент по маркировке некоторых видов безалкогольных напитков в мае этого года.
01.03
Мораторий на внеплановые проверки ККТ
Постановлением Правительства РФ от 29.12.2022 года №2516 «О внесении изменений в постановление Правительства Российской Федерации от 10 марта 2022 г.№336» на 2023 год продлён мораторий на внеплановые проверки ККТ.
-
Contents
-
Table of Contents
-
Bookmarks
Quick Links
Technical Documentation
03.15 Schn/JMo/Roe
Version 1.2
HB.C2K-EN
Crane Payment Innovations GmbH • Zum Fruchthof 6 • D-21614 Buxtehude
Phone: +49 (0) 41 61-729-0 • Fax: +49 (0) 41 61-729-115 • E-mail: info@cranepi.com • www.cranepi.com
Coin changer
for confi guration
Manual
Related Manuals for NRI Currenza C2
Summary of Contents for NRI Currenza C2
-
Page 1
Technical Documentation Coin changer Manual for confi guration 03.15 Schn/JMo/Roe Version 1.2 HB.C2K-EN Crane Payment Innovations GmbH • Zum Fruchthof 6 • D-21614 Buxtehude Phone: +49 (0) 41 61-729-0 • Fax: +49 (0) 41 61-729-115 • E-mail: info@cranepi.com • www.cranepi.com… -
Page 3: Table Of Contents
Confi guration ABLE OF CONTENT Tabel of contents About this manual Text conventions Additional technical documentation General information The vending machine interfaces The user interfaces When to use the HENRI service tool? Connecting HENRI Presettings Selecting menu language Setting display contrast (only c blue) Specifying display message for operating mode (only c blue)
-
Page 4
Confi guration ABLE OF CONTENTS Prices and vending modes (only c BDV/Executive) Price holding in the coin changer Setting prices Activating coin changer price holding Displaying price Confi guring «Committed to vend» or change return at any time Confi guring single or multi vend Resetting or storing credit which cannot be paid out Cash acceptance Limiting acceptance of coins and banknotes… -
Page 5
Confi guration ABLE OF CONTENT Activating change machine mode (small coins fi rst) 8-way c² spider payout (only c MDB) Assigning the c² spider cash box/hopper coins (only c MDB) 48 Inverting assignment of hopper and spider sorter chute (only c² MDB) Peripheral Hopper settings Setting hopper coins… -
Page 6
Confi guration ABLE OF CONTENTS Audit (option) Setting vending machine number Setting date and time Specifying data to be printed Setting output device Selecting printing format Selecting type of output device Activating maximum IrDA readout speed (only c with IrDA interface on coin validator) Activating Bluetooth audit (only c with Bluetooth module) Basic settings… -
Page 7: About This Manual
NRI changer currenza c and HENRI service tool must be read carefully (PDF download at www.cranepi.com, NRI Support). Text conventions To make it easier for you to navigate within these instructions and to operate…
-
Page 8: Additional Technical Documentation
Additional technical documentation Apart from the manual you already have, there is further documentation for the currenza c and HENRI service tool, e.g. about service work and technical data. All product descriptions are available as PDF at www. cranepi.com, NRI Support…
-
Page 9: General Information
Confi guration ENERAL INFORMATION General information In order to keep the manual as short as possible, this chapter provides you with all general information, which will not be repeated in the following chapters (e.g., connecting the HENRI service tool). The vending machine interfaces This manual refers to the confi…
-
Page 10: Connecting Henri
Confi guration ENERAL INFORMATION Connecting HENRI In the HENRI short reference guide you learn how to connect the HENRI service tool to the currenza c with full details. At this point you will only fi nd a short description for on-site confi gurations. Plug the RJ-45 connector of the HENRI connecting cable into the top right socket of the coin changer.
-
Page 11: Presettings
Confi guration RESETTINGS Presettings This chapter describes settings which are not concerned with the coin changer operation itself but must be carried out once before confi guring the coin changer, if not set at Crane Payment Innovations, Buxtehude: • Menu language •…
-
Page 12: Setting Display Contrast
Confi guration RESETTINGS Setting display contrast (only c blue) The contrast of the c blue display has a default setting of «46». To change the contrast: Quick approach: = Main menu > E = Settings > Other settings > Display contrast Press key …
-
Page 13: Specifying Display Message For Operating Mode
Confi guration RESETTINGS Specifying display message for operating mode (only c blue) During normal operating mode the currenza c² blue may display one of the following messages: Change • Total C stock in coin cassette 67.85 HANGE • C stock and total change stock in coin cassette ASHBOX by turns Cashbox…
-
Page 14: Settings For Fi Lling And Emptying Cassette
Confi guration ETTINGS FOR FILLING AND EMPTYING CASSETTE Settings for fi lling and emptying cassette This chapter describes useful or required settings for refi lling and emptying the coin cassette: • Confi guring fl oat level • Setting tube counters to fl oat-level automatically •…
-
Page 15: Confi Guring Fl Oat Levels
Confi guration ETTINGS FOR FILLING AND EMPTYING CASSETTE Confi guring fl oat levels Should you wish the service personal to always fi ll or empty the tubes at a fi lling level of a certain and always identical coin number, it is advisable to confi…
-
Page 16: Activating/Deactivating Fl Oat-Up Function
Confi guration ETTINGS FOR FILLING AND EMPTYING CASSETTE Activating/deactivating fl oat-up function You should activate the fl oat-up function if the cassette is refi lled by inserting the tube coins on site. This makes sure that all tube coins being inserted after the fl…
-
Page 17: Setting Tube Counters To Fl Oat Levels Automatically
Confi guration ETTINGS FOR FILLING AND EMPTYING CASSETTE Setting tube counters to fl oat levels automatically Activate this function if you remove the coin cassette to directly refi ll it with a certain number of coins (fl oat levels). This is to ensure that the tube counters will be set to the fl…
-
Page 18: Correcting Tube Counters According To Fi Lling Level Sensors
Confi guration ETTINGS FOR FILLING AND EMPTYING CASSETTE Correcting tube counters according to fi lling level sensors Six tube counters are monitoring the exact number of coins in the tubes and register each coin collected by and paid out from the tubes. In addition each tube is equipped with up to four fi…
-
Page 19: Resetting Tube Counters Before Fi Ll-Up
Confi guration ETTINGS FOR FILLING AND EMPTYING CASSETTE Resetting tube counters before fi ll-up If change is refi lled by inserting the tube coins but the cassette is removed to be completely emptied before fi ll-up, the coin changer should be set so that the tube counters will be reset when removing the cassette, i.e.
-
Page 20: Redirecting Cash-Box Coins To Return Area
Confi guration ETTINGS FOR FILLING AND EMPTYING CASSETTE Redirecting cash-box coins to return area If you replenish change by inserting coins and if you do not want the cash- box coins to be accepted but only the tube coins, the coin changer can be set so that all cash-box coins will be inhibited and redirected to the return area when the changer is in tube fi…
-
Page 21: Reporting Inserted Coins To Machine (Only C 2 Mdb)
Confi guration ETTINGS FOR FILLING AND EMPTYING CASSETTE Reporting inserted coins to machine (only c MDB) If you replenish change by inserting the tube coins in the tube fi lling mode and if you want the machine to count the coins inserted and display them for checking purposes, the coin changer may transfer a fi…
-
Page 22: Disabling/Enabling Inventory Keys / Disabling/Enabling Inventory
Confi guration ETTINGS FOR FILLING AND EMPTYING CASSETTE Disabling/enabling inventory keys / disabling/enabling inventory keys using MDB/BDV protocol (only c blue/green) During normal operating mode as well as in the Inventory menu the coin changer keys A, B, C, D, E and F are used as inventory keys. When operating the inventory keys the coin changer pays out coins from the corresponding change tube A, B, C, D, E or F.
-
Page 23: Prices And Vending Modes (Only C 2 Bdv/Executive)
Confi guration BDV/E RICES AND VENDING MODES ONLY C XECUTIVE Prices and vending modes (only c BDV/Executive) This BDV & Executive chapter describes how to • hold the prices in the coin changer • confi gure «Committed to vend» or change return at any time •…
-
Page 24: Setting Prices
BDV/E Confi guration RICES AND VENDING MODES ONLY C XECUTIVE Setting prices You can set up to 150 prices: Quick approach: = Main menu > E = Settings > Selling prices Press key … How often? Effect You enter the main menu You enter the S menu ETTING…
-
Page 25: Activating Coin Changer Price Holding
Confi guration BDV/E RICES AND VENDING MODES ONLY C XECUTIVE Activating coin changer price holding If you want the coin changer to hold the prices and include the product- specifi c sales data in the audit, you must activate the price holding function. To activate/deactivate the price holding function: Quick approach: = Main menu >…
-
Page 26: Displaying Price
BDV/E Confi guration RICES AND VENDING MODES ONLY C XECUTIVE Displaying price If you want the machine to display the price of the product selected, you have to adapt the coin changer confi guration accordingly. To display/suppress the price: Quick approach: = Main menu >…
-
Page 27: Confi Guring «Committed To Vend» Or Change Return At Any Time
Confi guration BDV/E RICES AND VENDING MODES ONLY C XECUTIVE Confi guring «Committed to vend» or change return at any time To ensure that the vending machine is not used as a money changer and inserted cash is returned whenever you want, the coin changer can be set up so that change is only paid out after a vending operation.
-
Page 28: Confi Guring Single Or Multi Vend
BDV/E Confi guration RICES AND VENDING MODES ONLY C XECUTIVE Confi guring single or multi vend In principle the customer can purchase a number of products one after the other once he has inserted his money (multi vend). The change is not paid out until the customer has operated the return lever.
-
Page 29: Resetting Or Storing Credit Which Cannot Be Paid Out
Confi guration BDV/E RICES AND VENDING MODES ONLY C XECUTIVE Resetting or storing credit which cannot be paid out If the remaining credit cannot be paid out of the coin cassette or connected hoppers or recyclers (payout units are empty or no appropriate tube/hopper coin/recycler banknote programmed), that credit can either be reset or saved for the next vending operation or customer.
-
Page 30: Cash Acceptance
Confi guration ASH ACCEPTANCE Cash acceptance This chapter describes how to adapt the acceptance of coins (and banknotes) to the machine environment: • Limiting acceptance of coins and banknotes (only c BDV/Executive) • Limiting acceptance of tube coins (fi lling level limitation) •…
-
Page 31: Limiting Acceptance Of Coins And Banknotes (Only C 2 Bdv/Executive)
Confi guration ASH ACCEPTANCE Limiting acceptance of coins and banknotes (only c BDV/Executive) In order to prevent the vending machine from being used as a money changer, you can set a maximum amount of money which may be accepted during a single vending operation (acceptance limitation). If this amount is reached or exceeded, the acceptance of coins and bills is inhibited.
-
Page 32: Limiting Acceptance Of Tube Coins (Fi Lling Level Limitation)
Confi guration ASH ACCEPTANCE Limiting acceptance of tube coins (fi lling level limitation) The changer can be confi gured so that each change tube accepts no more than a specifi c number of coins. When this number of coins is reached in a tube, all further coins for this tube are then directed into the cash-box temporarily.
-
Page 33: Inhibiting Coins
Confi guration ASH ACCEPTANCE Inhibiting coins If you want certain coins to be no longer accepted for payment at the machine, you may inhibit these coins (temporarily). The coin changer stores the coins 1–16 in ascending coin value order, i.e. «coin 01» is always the lowest-value and «coin 16» always the highest-value coin programmed.
-
Page 34: Inhibiting High-Value Coins If There Is Not Enough Change (Only C 2 Bdv/Executive)
Confi guration ASH ACCEPTANCE Inhibiting high-value coins if there is not enough change (only c BDV/Executive) If you want high-value coins to be no longer accepted whenever the machine displays «tube empty» (see section «Confi guring conditions for tube empty message (only c BDV/Executive)»…
-
Page 35: Optimising Acceptance Of Genuine Coins/Rejection Of Fraud Coins (Defi Ning Acceptance Tolerances)
Confi guration ASH ACCEPTANCE Optimising acceptance of genuine coins/rejection of fraud coins (defi ning acceptance tolerances) For the acceptance of (high-value) coins programmed the coin changer is capable of having up to three acceptance bands with different acceptance tolerances. In order that genuine coins are always accepted and fraud coins rejected reliably you may assign a «normal», «narrow»…
-
Page 36: Selecting Coin Group A Or B
Confi guration ASH ACCEPTANCE Selecting coin group A or B The coins porgrammed in the coin changer may have been assigned to two coin groups A or B at the manufacturer, e.g., to differentiate between two currencies (1 currency = coin goup A, 2 currency = coin group B).
-
Page 37
Confi guration ASH ACCEPTANCE Use DIL switch 10 to select coin group A or B (see Fig. 3). Coin group B Coin group A Fig. 3: Selecting coin group Reinsert coin validator until it clicks in position (see Fig. 2, B & C). Turn power on. -
Page 38: Preventing Coins From Getting Stuck In The Tubes
Confi guration ASH ACCEPTANCE Preventing coins from getting stuck in the tubes If a security stock is confi gured for the individual change tubes, the changer does not pay out a minimum number of tube coins. For coins that cause problems during stacking and tend to stand upright instead of lying fl…
-
Page 39: Transmitting Tube Fi Lling Level Incl. Security Stock To Vmc (Only C 2 Mdb)
Confi guration ASH ACCEPTANCE Transmitting tube fi lling level incl. security stock to VMC (only c MDB) The coin changer is able to transmit the fi lling level of the tubes inclusive of the security stock confi gured to the vending machine control system. To defi…
-
Page 40: Change Payout
Confi guration HANGE PAYOUT Change payout This chapter describes how to adapt the change payout to the machine environment: • Reassigning coin cassette • Reporting more than 255 coins of the same payout denomination to VMC (only c MDB) • Limiting change return (only c BDV/Executive) •…
-
Page 41
Confi guration HANGE PAYOUT To select a new tube combination: Quick approach: = Main menu > E = Settings > Coin settings > Coin sorting > Select tube cassette Press key … How often? Effect You enter the main menu You enter the S menu ETTING… -
Page 42: Reporting More Than 255 Coins Of The Same Payout
Confi guration HANGE PAYOUT Reporting more than 255 coins of the same payout denomination to VMC (only c MDB) If you want the coin changer to collect more than 255 coins of the same payout denomination in several tubes of the coin cassette, the MDB protocol would report not more than 255 coins as a standard.
-
Page 43: Limiting Change Return
Confi guration HANGE PAYOUT Limiting change return (only c BDV/Executive) You have the possibility to defi ne a maximum residual amount that the changer is supposed to pay out to the customer at most. The customer must then purchase enough during one vending operation so that the residual credit is less than the set change limitation.
-
Page 44: Confi Guring Conditions For Tube Empty Message
Confi guration HANGE PAYOUT Confi guring conditions for tube empty message The lowest fi lling level sensor (empty sensor) signals that a tube is empty. When you want the vending machine to display «tube empty», i.e. which tube(s) is/are to be empty, in order that the empty message is displayed, you may specify depending on the tube coins.
-
Page 45
Confi guration HANGE PAYOUT To confi gure the tube empty code: Quick approach: = Main menu > E = Settings > Coin settings > Condition for tube empty Press key … How often? Effect You enter the main menu You enter the S menu ETTING You want to enter submenu C… -
Page 46: Activating Low-Power Single-Motor Payout
Confi guration HANGE PAYOUT Activating low-power single-motor payout If you want the coin changer to use as less electricity as possible, e.g. in battery operation, it may use only one motor instead of all motors at the same time when paying out coins. To activate/deactivate the single-motor payout: Quick approach: = Main menu >…
-
Page 47: Activating Change Machine Mode (Small Coins Fi Rst)
Confi guration HANGE PAYOUT Activating change machine mode (small coins fi rst) If you want the coin changer to always give as small change as possible (change machine mode) : Quick approach: = Main menu > E = Settings > Operating modes > Payout as change machine Press key …
-
Page 48: Mdb)
Confi guration ERIPHERAL 8-way c² spider payout (only c MDB) The c² spider is able to payout up to two more coin denominations from the installed hoppers 1 and 2. When changing the hopper or cash box coins please consider the following settings: •…
-
Page 49: Inverting Assignment Of Hopper And Spider Sorter Chute (Only C² Mdb)
Confi guration ERIPHERAL Press key … How often? Effect Now you can confi gure the hopper and cash box coins You want to direct this coin into the until old hopper coin cash box and no longer into a hopper Now you can select the cash box channel (default) will direct the coin into the cash…
-
Page 50: Peripheral
If a coin type is frequently paid out as change, and the respective tube is often empty, you can use an NRI hopper interface to connect up to four hoppers to the coin changer from which the vending machine can pay out coins on an alternative basis.
-
Page 51: Setting Hopper Coins
Confi guration ERIPHERAL Setting hopper coins To confi gure the value of the coins collected in the hopper(s): The hopper designations 1–4 refer to the connectors 1–4 on the hopper interface used to connect the hopper(s) to the coin changer (cp.
-
Page 52: Setting Up Communication With Hopper(S)
Confi guration ERIPHERAL Setting up communication with hopper(s) To activate the communication between coin changer and hopper(s): Quick approach: = Main menu > E = Settings > Peripheral > Hopper > Communication with hopper Press key … How often? Effect You enter the main menu You enter the S menu…
-
Page 53: Making Hopper Coins To Be Paid Out Fi Rst
Confi guration ERIPHERAL Making hopper coins to be paid out fi rst By default change is given out of the coin cassette fi rst. If you want the changer to give change from the hopper(s) fi rst: Quick approach: = Main menu > E = Settings > Peripheral > Hopper > Preferential hopper coins Press key …
-
Page 54: Disabling/Enabling Hopper Empty And/Or Full Detection
Confi guration ERIPHERAL Disabling/Enabling hopper empty and/or full detection If the hoppers connected are equipped with a fi lling level detection, the hopper coins in and out counters controlled by the coin changer will be corrected according to the hopper empty or full detection. For a precise audit of the hopper coin number it is therefore recommended that the hopper’s level detection is deactivated in order that the exact coin counters will not be corrected:…
-
Page 55: Recycler Settings
Confi guration ERIPHERAL Recycler settings If you want the vending machine to pay out banknotes as change, you may use the recycler interface to connect a recycler (banknote payout unit) to the coin changer from which the vending machine can pay out banknotes instead of coins.
-
Page 56
Confi guration ERIPHERAL To activate the communication between an BDV/Executive coin changer and a recycler: Quick approach: = Main menu > E = Settings > Peripheral > Bill recycler Press key … How often? Effect You enter the main menu You enter the S menu ETTING… -
Page 57: Inhibiting High-Value Banknotes Depending On Change Stock (Only C 2 Mdb)
Confi guration ERIPHERAL Inhibiting high-value banknotes depending on change stock (only c MDB) If a CashCode recycler is conntected to an MDB coin changer, you can inhibit the acceptance of high-value banknotes if there is not enough change. I.e. before each sale the coin changer decides which banknote can be accepted and which cannot be accepted, depending on the current change stock in the coin cassette and recycler.
-
Page 58: Paying Out All Banknotes (Compensating The Machine’s Security Stock) (Only C 2 Mdb)
Confi guration ERIPHERAL Paying out all banknotes (compensating the machine‘s security stock) (only c MDB) Some vending machines (particularly in the USA) keep a security stock of coins in the tubes. As the machine handles banknotes available for payout like tube coins not all of the banknotes can be payed out as change. If you want the vending machine to pay out all banknotes you can compensate the security stock.
-
Page 59: Bill Validator Settings
Confi guration ERIPHERAL Bill validator settings (only c BDV/Executive) You may connect an MDB bill validator to the coin changer. Please consider the following coin changer settings for communication between both devices: • Communication set-up • No acceptance of banknotes when machine displays «Tube empty» •…
-
Page 60: Inhibiting/Releasing Banknote Acceptance Depending On Change Stock Or Card Payments
Confi guration ERIPHERAL Inhibiting/releasing banknote acceptance depending on change stock or card payments • Inhibiting banknote acceptance if machine displays «Tube empty»: If the coin cassette has a shortage of change and the machine displays «Tube empty» (depending on conditions set), the bill validator can be blocked automatically.
-
Page 61: Activating/Deactivating Escrow Function
Confi guration ERIPHERAL Activating/deactivating escrow function If the bill validator connected has an escrow system, you should activate the escrow function in the c² peripheral settings: Quick approach: = Main menu > E = Settings > Peripheral > Bill validator > Escrow function Press key …
-
Page 62: Card Reader Settings (Only C 2 Bdv/Executive)
Confi guration ERIPHERAL Card reader settings (only c BDV/Executive) This section describes how to • set up communication between coin changer and MDB/BDV card reader • activate a second price list for card payments • limit card charging • reinitialise the card reader after a sale Setting up communication with MDB/BDV card reader The following card systems may be connected to the coin changer: •…
-
Page 63: Activating Second Price List For Card Transactions
Confi guration ERIPHERAL Activating second price list for card transactions You can divide the up to 150 prices into 2 x 75 prices. The fi rst price list (prices 1–75) is valid without any card inserted (for cash sales), and the second price list (prices 76–150) is valid with a card inserted (for card payment).
-
Page 64: Limiting Debit Card Recharging (Only For Bdv/Mdb Card Readers)
Confi guration ERIPHERAL Limiting debit card recharging (only for BDV/MDB card readers) In case a BDV or MDB card system is connected to the coin changer, you may defi ne a maximum credit with which debit cards can be charged. If you do no longer want the customers to credit their debit cards, you can confi…
-
Page 65: Setting Up Communication With External Audit Unit (Only C 2 Bdv/Executive)
Confi guration ERIPHERAL Setting up communication with external audit unit (only c BDV/Executive) If there is an external machine audit unit connected, the only thing to do is to set up communication with the coin changer. To activate the communication between coin changer and external audit unit: Quick approach: = Main menu >…
-
Page 66: Audit (Option)
Confi guration UDIT Audit (option) This chapter describes all settings to be considered if the coin changer is equipped with an internal audit module. You learn how to • set the vending machine number • set date and time • specify data to be printed •…
-
Page 67
Confi guration UDIT To set the vending machine number: Quick approach: = Main menu > E = Settings > Audit module > Machine number Press key … How often? Effect You enter the main menu You enter the S menu ETTING You want to enter submenu A UDIT… -
Page 68: Setting Date And Time
Confi guration UDIT Setting date and time In order to be able to print or read out the audit data with date and time, you have to set the system time: Quick approach: = Main menu > E = Settings > Audit module > Set system date/time Press key …
-
Page 69: Specifying Data To Be Printed
Confi guration UDIT Specifying data to be printed For the printout of audit data you can set the following: • Printing/Not printing time • Printing/Not printing product/price-specifi c audit data • Printing/Not printing tube and cash-box sales data The language of the audit receipts has been selected with the dialogue language (cp.
-
Page 70: Setting Output Device
Confi guration UDIT Setting output device Please set once with which printer/data acquisition device you want to output audit receipts (with or without start button) and which format is going to be used. The language of the audit receipts has been selected with the dialogue language (cp.
-
Page 71: Selecting Type Of Output Device
Set the NRI printer G-55.0510 to «(start button) not exists» and the NRI USB Audit Stick to «(start button) exists». To select the type of output device: Quick approach: = Main menu >…
-
Page 72: Activating Maximum Irda Readout Speed (Only C 2 With Irda Interface On Coin Validator)
Confi guration UDIT Activating maximum IrDA readout speed (only c with IrDA interface on coin validator) If the changer’s coin validator is equipped with an IrDA interface and this interface is used to readout audit data, you can set a maximum readout speed of 115 kBd in the coin changer.
-
Page 73: Activating Bluetooth Audit
Confi guration UDIT Activating Bluetooth audit (only c with Bluetooth module) If the coin changer has been retrofi tted with a Bluetooth interface module and audit data is going to be read out via Bluetooth, you have to enable the Bluetooth audit function in the changer audit settings beforehand: If the changer has already been delivered as c²…
-
Page 74: Basic Settings
Confi guration ASIC SETTINGS Basic settings This chapter describes how to perform basic changer settings, that seldom need to be changed (e.g. for a new installation site): • Smallest coin value as a basis of calculation for coin values/prices • Decimal point position •…
-
Page 75
Confi guration ASIC SETTINGS To change the smallest coin value: Quick approach: = Main menu > E = Settings > Other settings > Base coin value Press key … How often? Effect You enter the main menu You enter the S menu ETTING You want to enter submenu O… -
Page 76: Changing Decimal Point Position (Only C 2 Mdb)
Confi guration ASIC SETTINGS Changing decimal point position (only c MDB) This function specifi es the position of the decimal point for the vending machine display. You may set from no decimal place (point) to three decimal places. The decimal point setting has an infl uence on the functions listed in the following: •…
-
Page 77: Confi Guring Alternative Coin Value For Second Currency Or As Token Value
Confi guration ASIC SETTINGS Confi guring alternative coin value for second currency or as token value With the alternative coin value you may specify on the one hand the coin value of a second currency and on the other hand the value for a token. Confi…
-
Page 78: Changing Currency/Calling Code (Only C 2 Mdb)
Confi guration ASIC SETTINGS Changing currency/calling code (only c MDB) The numeric currency code (ISO 4217) which can be sent, e.g., for the VMC dialogue language is set to the main currency on delivery. Please use the last three digits of the 4-digit input fi eld to set the 3-digit currency code.
-
Page 79: Changing Mdb Level (Only C 2 Mdb)
Confi guration ASIC SETTINGS Changing MDB level (only c MDB) In cases the coin changer is supposed to communicate as MDB level 2 instead of MDB level 3 changer: Quick approach: = Main menu > E = Settings > Other settings > MDB level Press key …
-
Page 80: Selecting Mains Operation Or Battery Operation (Only C 2 Mdb)
Confi guration ASIC SETTINGS Selecting mains operation or battery operation (only c MDB) Depending on the installation site, MDB coin changers equipped with a battery and a wake-up line, can always be switched to mains or battery operation. For this the changer has two DIL switches accessible when removing the coin cassette: Fig.
-
Page 81: Confi Guring Wake-Up Time (Only C 2 Mdb)
Confi guration ASIC SETTINGS Reinsert coin cassette: – Insert cassette in upper and lower housing guides (Fig. 4, B). – Push cassette into the housing. – Press cassette down and let it engage in the upper and lower housing guides (audible click) (Fig. 4, C). Switch the power off and then on again.
-
Page 82: Providing Coin Changer Confi Guration With Write Protection For Bdv Machines (Only C 2 Bdv)
Confi guration ASIC SETTINGS Providing coin changer confi guration with write protection for BDV machines (only c BDV) You may provide the confi guration data of the coin changer with a write protection in order that it cannot be overwritten by the BDV vending machine control.
-
Page 83: Batch Confi Guration
Confi guration ATCH CONFIGURATION Batch confi guration If the same settings are to be made for several coin changers of the same series, it is suffi cient to 1. confi gure one changer as required, 2. save this state of settings in the HENRI service tool and then 3.
-
Page 84: Storing Desired Confi Guration In Henri
Confi guration ATCH CONFIGURATION Storing desired confi guration in HENRI First of all connect the HENRI service tool to the coin changer with the confi guration to be cloned (see section «Connecting HENRI» in Chap. 2 «General information»). Quick approach: = HENRI main menu >…
-
Page 85: Adapting Individual Settings
Confi guration ATCH CONFIGURATION Adapting individual settings Finally we recommend random checks of the data cloned and that individual settings of the changers or the coin and currency data is adapted, if necessary.
-
Page 86: Index
Confi guration NDEX Index 2 price lists with cashless 63 Base value See Smallest coin value 12/24 character printout, audit module 70 Basic settings 74 Batch confi guration 83 Battery operation Acceptance Save current 46 Band, select 35 Select 80 Limit See Acceptance limitation Wake-up time 81…
-
Page 87
Float level 15 Currency More than 255 same coins 42 Code 78 New 40 Select 36 Remove/reinstall 80 currenza c2 Replenishment, display 21 blue/green/orange/white 9 Security stock 38 Machine interfaces 9 Group A/B, select 36 User interfaces 9 Stack, problems 38… -
Page 88
Confi guration NDEX Display Contrast 12 Hazard 7 Message (operating mode) 13 HENRI Price 26 Connect 10 Texts 7 General information 9 Disposal 7 Hopper 50 Documentations, additional 8 Coin counter correction 54 Coin values 51 c² spider 48 Empty Inverting c²… -
Page 89
Confi guration NDEX Peripheral devices 50 Pictograms in the text 7 Machine Presettings 11 Interfaces, c2 9 Price holding 25 Number 66 Prices Mains operation, select 80 Display 26 Manage prices (price holding) 25 Extra for card payment 63 Manual Manage 23 Additional 8 Set 24… -
Page 90
Confi guration NDEX Select tube cassette 40 Selling price Text conventions 7 Display 26 Time/date, audit module 68 Extra for card payment 63 Token Manage 23 Settings 30 Set 24 Teaching 30 Sensors, tubes 18 Value 30 Service tool HENRI Tube Connect 10 Coins…
Не правильно выдает сдачу?
Для возобновления правильной работы монетоприемник нужно обнулить.
Порядок обнуления монетоприемника:
а) для версии монетоприемника NRI G46
Для обнуления счетчиков труб следует использовать встроенную клавиатуру монетоприемника (кнопки L, ML, MR, R). Чтобы имитировать выплату одной монеты из трубы, нажмите однократно соответствующую кнопку. Для обнуления счетчика каждой трубы нажмите на соответствующую кнопку и удерживайте ее не менее 4 секунд. Дождитесь окончания автоматической выплаты. Как только из трубы вылетела последняя монета, нажмите и удерживайте ту же кнопку для включения холостого хода, дайте монетоприемнику прокрутить вхолостую 5–6 оборотов. Эту операцию произведите последовательно для каждой трубы монетоприемника.
Важно: кнопку «+» не нажимать!
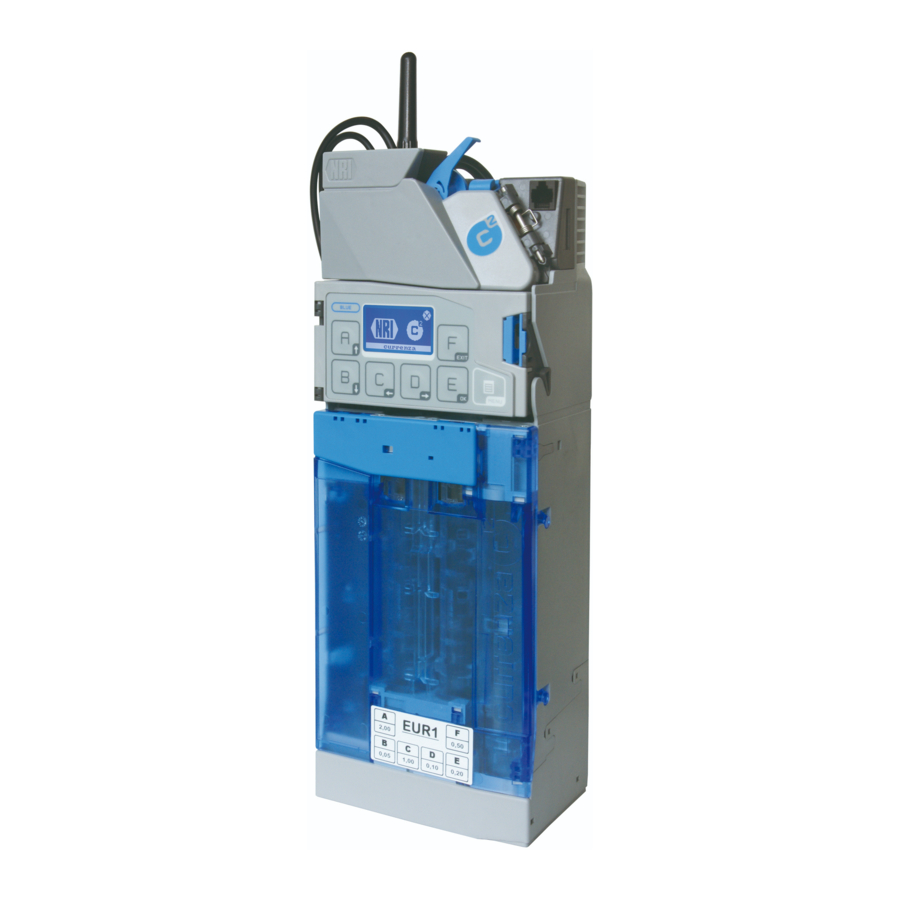
б) для версии монетоприемника NRI CURRENZA
Для обнуления счетчиков труб следует использовать встроенную клавиатуру (кнопки A, B, C, D, E, F). Чтобы имитировать выплату одной монеты из трубы, нажмите однократно соответствующую кнопку. Для обнуления счетчика трубы нажмите на кнопку и удерживайте ее не менее 4 секунд. Дождитесь окончания автоматической выплаты. Как только из трубы вылетела последняя монета, нажмите и удерживайте кнопку для включения холостого хода, дайте монетоприемнику прокрутить вхолостую 5–6 оборотов. Эту операцию произведите последовательно для каждой трубы монетоприемника.
Важно: кнопки «+», «MENU» не нажимать!
После обнуления перезагрузите весь автомат с помощью кнопки “ON/OFF” и, войдя в меню загрузки сдачи, загрузите монеты. В каждую трубу монетоприемника необходимо внести минимум по три монеты каждого номинала, только после этого он начнет отображать сумму сдачи на дисплее.
Не заполняет трубы до конца
Для возобновления правильной работы монетоприемник нужно обнулить.
Алгоритм обнуления монетоприемника подробно описан выше (пункт «Неправильно выдает сдачу»).
В случае, если операция не помогла, проверить индикацию монетоприемника. Левый светодиод должен гореть зеленым. Необходимо проверить остаток сдачи в меню «Загрузка сдачи». Счетчик должен быть равен нулю. Если счетчик нулю не равен, необходимо провести повторное обнуление, дать каждой трубе по 15 оборотов.
Если не помогло, разобрать монетоприемник, проверить на засор и сухой тряпочкой без ворса протереть датчики. Внимание, не применяйте никаких чистящих средств при чистке датчиков!
Инструкция по разборке монетоприемника есть ниже, в разделе «Не выдает монеты».
Возникает расхождение между суммой монет в монетоприемнике и в меню загрузка сдачи
Для возобновления правильной работы монетоприемник нужно обнулить.
Алгоритм обнуления монетоприемника подробно описан выше (пункт «Неправильно выдает сдачу»).
Не выдает монеты
Существует несколько возможных причин неисправности.
Для уточнения причины откройте денежный отсек и проверьте следующие параметры монетоприемника:
а) Если на монетоприемнике мигает красный диод, возможно, произошло засорение монетоприемника монетами.
Для устранения неисправности необходимо открутить и поднять верхнюю крышку аппарата (см. соответствующий пункт Инструкции оператора), затем снять валидаторную головку монетоприемника (его верхнюю часть, через которую поступают монеты).
Чтобы снять валидаторную головку:
— на монетоприемнике NRI G46 необходимо, соблюдая осторожность, отверткой приподнять пластмассовую защелку (А), одновременно потянув на себя головку (B) (см. рис.). После снятия головки отсоедините ее от подведенного кабеля.
Для NRI G46 {mosimage}
— на монетоприемнике NRI CURRENZA поднимите фиксатор, а затем снимите валидаторную головку движением на себя и в сторону.
Сняв валидаторную головку, аккуратно очистите ее монетный тракт и монетный тракт основания с механизмом выплаты сдачи от монет и посторонних предметов. Монетный тракт основания с механизмом выплаты сдачи расположен у задней стенки справа.
б) Если на монетоприемнике мигает желтый светодиод, это означает, что постоянно нажат рычаг возврата монет.
Проверьте работу рычага возврата монет. При плавном нажатии и отпускании рычага должно быть слышно срабатывание микро-выключателя. Отрегулируйте нажимную пластину механизма кнопки возврата аппарата.
в) Если не наполняется одна или несколько труб, причиной может быть западание флажка оптического датчика заполнения соответствующей трубы.
Флажок расположен внутри трубы, в верхней ее части. Снимите головку монетоприемника и обеспечьте свободный ход соответствующего флажка, либо удалите его.
г) Если монеты в одной или нескольких трубах не выдаются на сдачу, возможно, произошло заклинивание монеты в механизме выплаты сдачи.
Для устранения заклинивания необходимо нажать на кнопку, соответствующую данной трубе и, не сильно постукивая по нижней части основания с механизмом выплаты сдачи, попробовать устранить заклинивание.